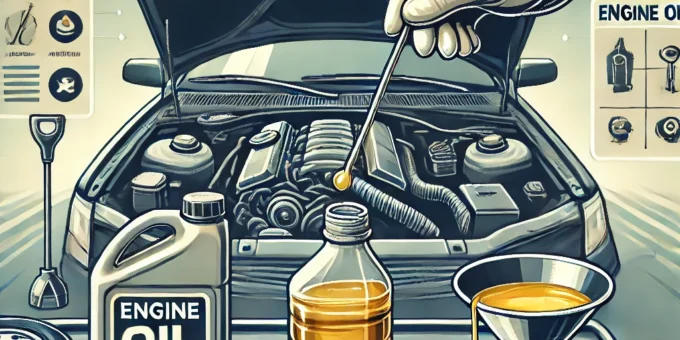
Engine oil is the lifeblood of your car, keeping the engine parts lubricated and running smoothly. Regularly checking and replacing your car’s engine oil is one of the simplest yet most critical maintenance tasks to ensure your vehicle’s longevity and performance.
This guide will walk you through the process of checking and replacing your car’s engine oil, providing step-by-step instructions, tools you’ll need, and helpful tips for first-time DIYers.
Why Regular Engine Oil Maintenance is Crucial
Engine oil lubricates moving parts, reduces friction, and prevents overheating. Skipping oil changes can lead to:
- Engine Wear and Tear: Lack of lubrication causes parts to grind together, leading to damage.
- Overheating: Old or insufficient oil can’t absorb heat effectively.
- Reduced Performance: Dirty oil clogs engine components, affecting fuel efficiency and power.
Pro Tip: Keeping your oil clean and topped up can extend your engine’s life by years.
How Often Should You Check and Replace Engine Oil?
The frequency depends on your car, driving habits, and the type of oil you use.
- Checking Oil: Once a month is ideal.
- Replacing Oil: Follow these general guidelines:
- Conventional Oil: Every 3,000–5,000 miles or 3–6 months.
- Synthetic Oil: Every 7,500–10,000 miles or 6–12 months.
Tip: Refer to your owner’s manual for the manufacturer’s specific recommendations.
Tools and Materials Needed
Before starting, gather the following:
- For Checking Oil:
- Clean rag or paper towel.
- Nitrile gloves (optional).
- For Replacing Oil:
- New engine oil (check your owner’s manual for the correct type and quantity).
- Oil filter.
- Oil filter wrench.
- Funnel.
- Drain pan.
- Socket wrench or spanner.
Step 1: How to Check Your Engine Oil
Follow these steps to check your car’s engine oil level:
- Park on a Level Surface: Ensure the car is on a flat surface to get an accurate reading.
- Turn Off the Engine: Let the engine cool for at least 10 minutes.
- Locate the Dipstick: Open the hood and look for the dipstick, usually marked with a brightly colored handle.
- Pull Out the Dipstick: Wipe it clean with a rag or paper towel.
- Reinsert and Remove the Dipstick: Push the dipstick back in completely, then pull it out again to check the oil level.
- Read the Level: Look for the oil level between the “MIN” and “MAX” marks on the dipstick. If it’s below the “MIN” mark, you need to add oil.
Step 2: Identifying When to Replace Oil
Oil degrades over time, so look out for these signs that it’s time for a change:
- Dark, Dirty Oil: Fresh oil is amber-colored; old oil turns black and gritty.
- Low Oil Level: If you frequently need to top up oil, it may be time for a change.
- Oil Change Warning Light: Some cars have dashboard indicators for oil changes.
- Knocking Noises: Insufficient lubrication may cause unusual engine sounds.
Step 3: How to Replace Your Engine Oil
1. Prepare the Car:
- Park on a level surface and engage the parking brake.
- Let the engine cool for 10–15 minutes.
2. Drain the Old Oil:
- Place a drain pan under the oil drain plug (located beneath the engine).
- Use a socket wrench to unscrew the plug and allow the old oil to drain completely.
- Replace the drain plug once the oil has stopped dripping.
3. Replace the Oil Filter:
- Use an oil filter wrench to remove the old filter.
- Apply a thin layer of fresh oil to the rubber gasket of the new filter.
- Screw in the new filter by hand until snug, then tighten an additional quarter turn.
4. Add New Oil:
- Use a funnel to pour the recommended amount of new oil into the engine via the oil filler cap.
- Check the oil level with the dipstick to ensure it’s at the correct level.
5. Start the Engine:
- Run the engine for 1–2 minutes, then turn it off.
- Recheck the oil level and top off if necessary.
Step 4: Dispose of Used Engine Oil Properly
Used oil is hazardous and should never be poured down drains or thrown in the trash.
How to Dispose of Oil Safely:
- Pour the used oil into a sealable container.
- Take it to a local recycling center, auto parts store, or oil change shop that accepts used oil.
Common Mistakes to Avoid
- Overfilling the Engine: Too much oil can damage seals and create excessive pressure.
- Skipping the Filter Change: A dirty filter contaminates fresh oil.
- Ignoring the Owner’s Manual: Always use the oil type and quantity specified for your car.
DIY vs. Professional Oil Changes
DIY Oil Changes:
- Cost-effective and rewarding for those with basic mechanical skills.
- Requires the right tools and knowledge of your car’s components.
Professional Oil Changes:
- Convenient and ensures proper handling of used oil.
- Ideal if you lack time, tools, or confidence.
FAQs About Engine Oil Maintenance
Can I mix synthetic and conventional oil?
While mixing is possible, it’s not ideal. Stick to one type for consistent performance.
What happens if I skip an oil change?
Skipping oil changes can lead to engine sludge, increased wear, and reduced fuel efficiency.
How do I know which oil to use?
Check your owner’s manual for the recommended viscosity (e.g., 5W-30) and type (synthetic or conventional).
Checking and replacing your car’s engine oil is a simple yet vital maintenance task that keeps your engine healthy and running smoothly. By following this guide, you can confidently handle oil changes and avoid costly repairs.
Remember, regular oil maintenance is one of the easiest ways to protect your investment and ensure a longer life for your car. So, grab your tools, check your oil, and enjoy a well-maintained ride!